Recently I had purchased the new “Slat Gray” color Mechanics Cart from Harbor Freight. If you were like me and one of the first people buying them. You will have to wait a few months to receieve it. I ordered it on March 5th 2022 and got it early on April 18th 2022 when my projected delivery date for pickup was June 25th 2022. These helpful tips are also the same for the other colors they have of this model box (5 drawer version).
While trying to setup mine. I had to take it apart about 4 times in total for using the wrong nuts and having parts the wrong way. After a while I took it all apart, sorted the screws and bolts I headed over to Youtube to see how others setup theirs. Thats when I found a few different videos that were very helpful and the one guy credited at the bottom of this post explained the two main questions I had. He also has a bunch of other helpful tips. I am going to link the video at the end of the post but for people who don’t want to watch the whole thing. I will lay out the key points here in photos.
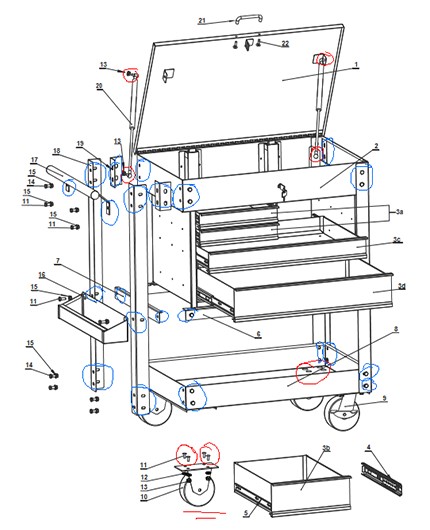
The diagram
Use all of SET1 on everything accept for the Casters (wheels) and the Gas Struts (lid arms) followed by using SET2 as circled in the diagram.
 click the photo to get full size
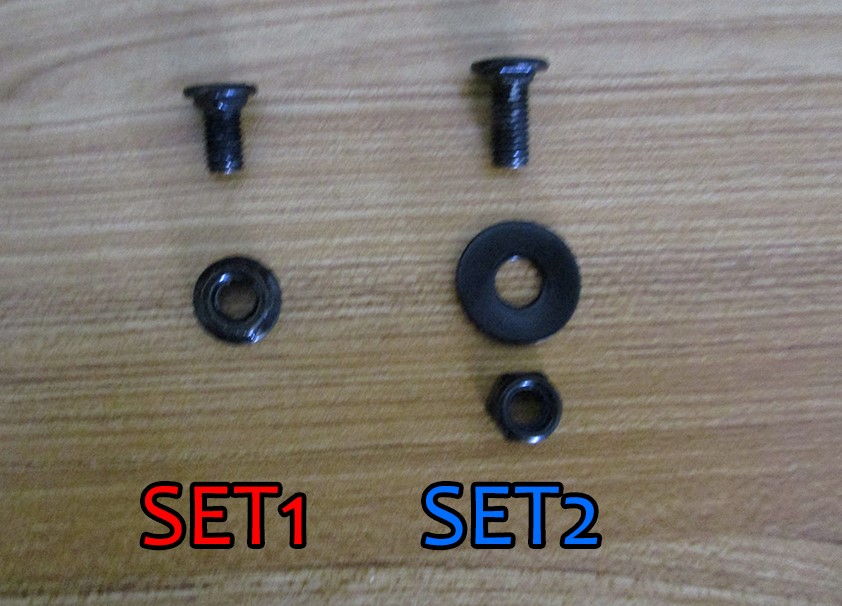
The screws
These are the type of screw sets that will be used and reffered to as. For the sake of this I will call the first set of hardware SET1 and the 2nd second set of hardware SET2.
 click the photo to get full size
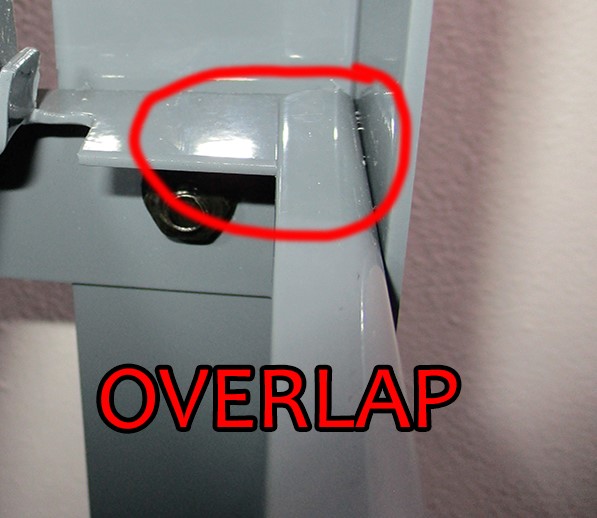
Overlap bars
In the manual it doesn’t really outline this part but you will want to overlap the short side bars ontop of the long front bars.
 click the photo to get full size
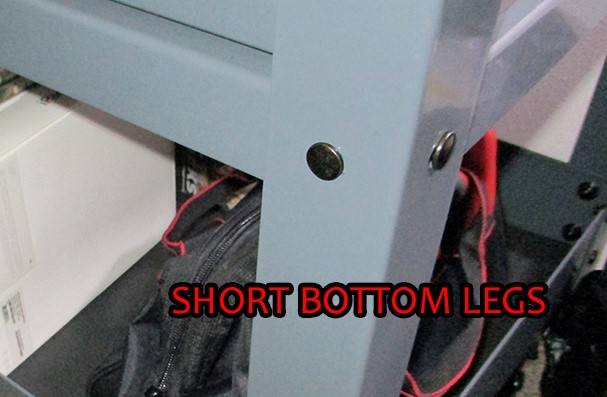
Bottom bar holes
Lastly, you will want to make sure all of the side posts have the middle holes the farthest to the bottom of the chest.
 click the photo to get full size
Putting the box together
In order to get the top main box in the center. You will want to get help from someone else unless you’re hulk. You can do it yourself by locking the box and turning it upside down. It’s best to lay it on carpet or something soft so you don’t scratch it up. Now take all 4 of the small metal Brackets and put them on the corners of the box that you just flipped upside down. Then take the main cart and turn it upside down putting it over the bottom of the main box. The last part is a bit tricky as you will have to hold the box firmly and slowly lift it up. Guiding it so it’s centered as it slides into place. One last piece of information is to make sure the back lid ribbits on the left and right side are infront of the back left and right sides. This is something I didn’t notice until I had a hard time screwing the box together as none of the holes were lineing up.
The credits
This post couldn’t of been made without the help of various videos but this specific Youtube video:
Extra information
- You can purchase your tool box today here: https://www.harborfreight.com/30-in-5-drawer-mechanics-cart-slate-grey-58833.html
- You can download the official manual here: https://manuals.harborfreight.com/manuals/64000-64999/64033.pdf should you need another copy.
Info
You can download this manual and the Youtube video in the event these are no longer available.